
Product photography uses specific techniques to showcase your products in an attractive and eye-catching way to entice potential buyers to purchase specific products.
Product photography is an essential part of both online and offline advertising for successful catalogues, brochures, magazine ads, billboards, online ads and company websites, specifically when selling products direct to the consumer.
93% of consumers consider photographs of the product essential in purchasing decisions.
Your images represent your product’s perceived value and quality. They speak directly to your target audience, making your product page and content more relatable to the viewers.
TIP ONE
Brand Your Images
Images are a key element of branding. Branding should be central and vital to every decision you or your company makes, including your social media posts, website updates and all your marketing efforts.
Images are the first thing to grab someone’s attention and invite customers to take a closer look.
Your goal is to form “long-distance relationships” with your customers, and having the correct photographs is the right way to go.
Consumers seek time-saving shortcuts all the time, and their attention naturally gravitates to the quickest way to gather information: images.
TIP TWO
Find The Type of Photography that Best Suits your Product.
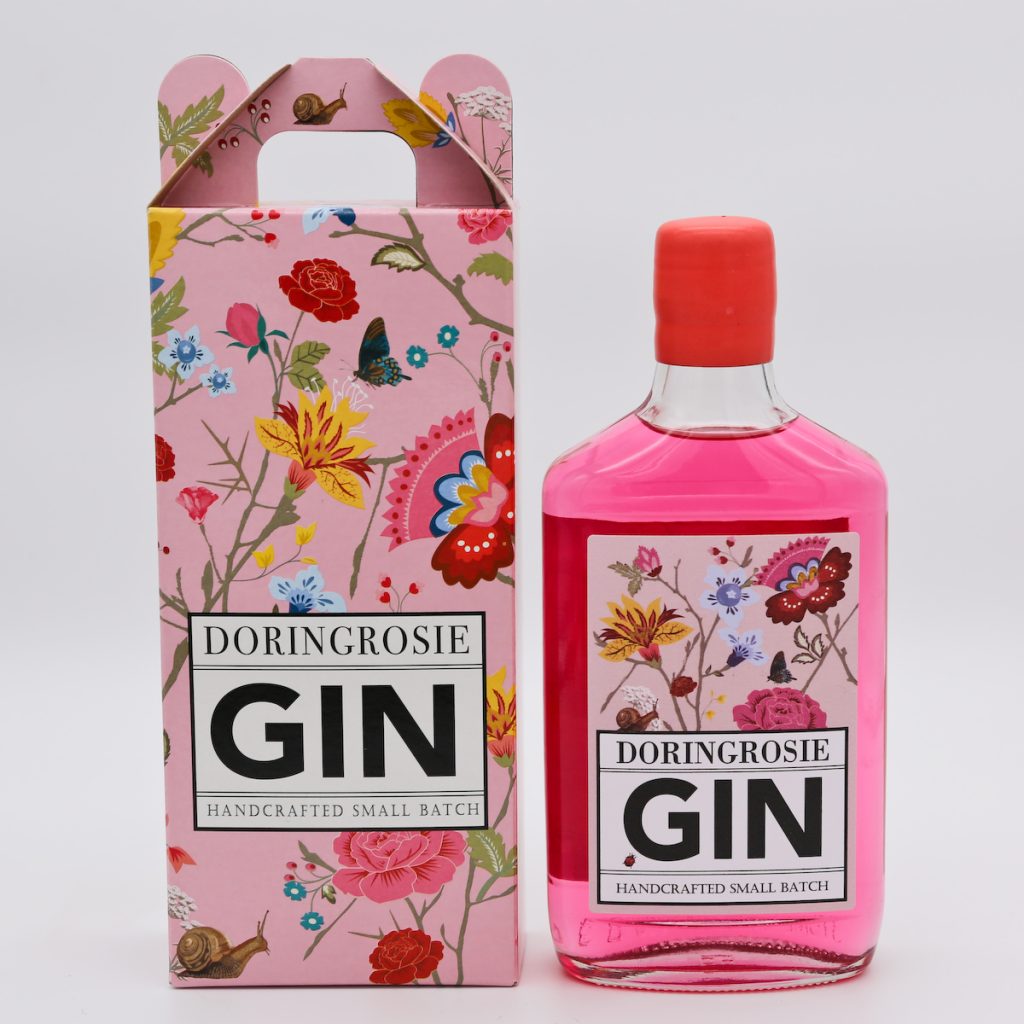
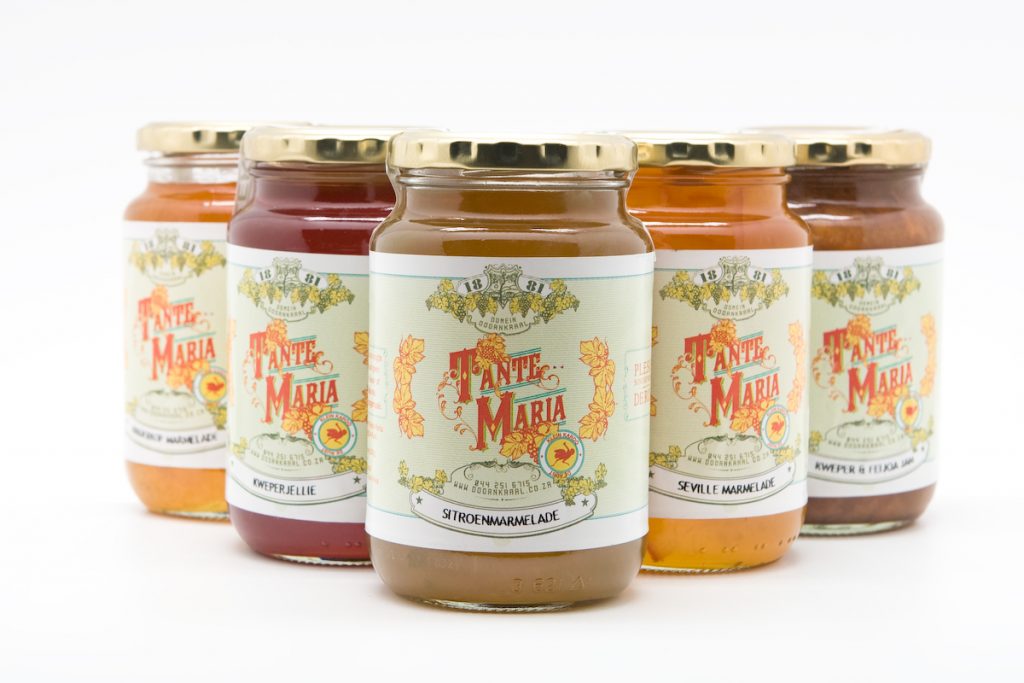
There are two main types of eCommerce photography. The first is clean-cut, white background, product-only images. These should include your featured product and a variety of images showcasing your product from different angles.
Product-only images are meant to show your product in its best light from all relevant angles. They are usually shot on a white background, helping to create a consistent look across your product line.
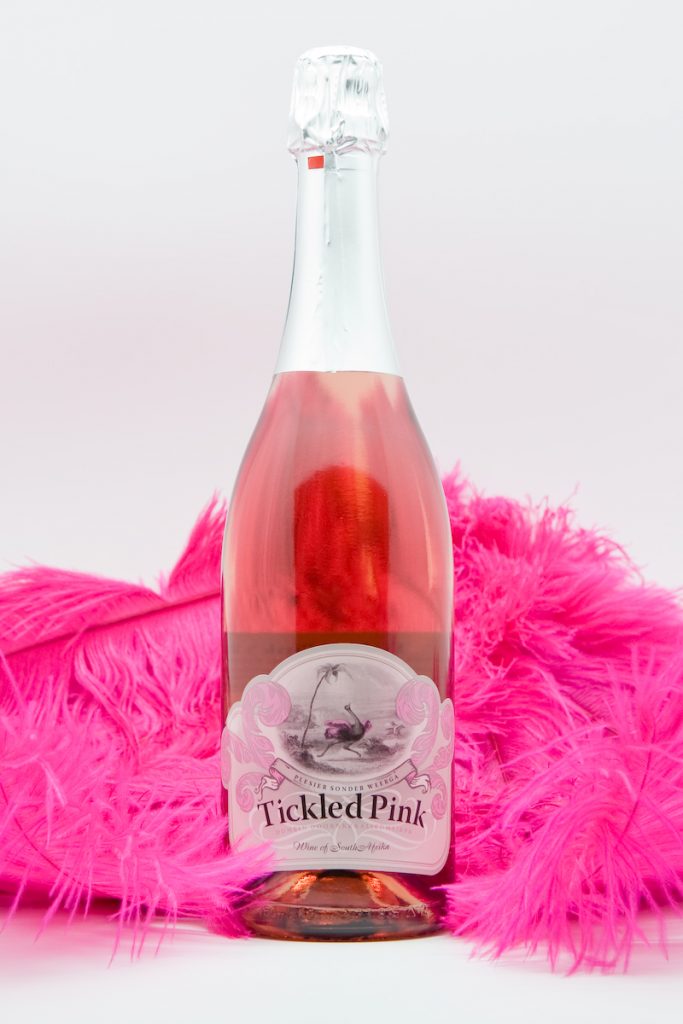
The second is in-context or lifestyle photos that show your product being used in its intended environment or alongside complementing the products.
Lifestyle shots, ones that tell a story, are best suited for social media, blog posts, emails, and other marketing channels at the top of your conversion funnel.

TIP THREE
Background or Backdrop?
Finding the correct background is the first step before the photographing commences. Depending on the type of photography you are using, and what your product is, may depend on your background choice.
Getting the correct background is worth the effort, and there are plenty of ways to improvise a background.
For example, a shooting chair can be created using any home or office chair with a white cloth or big piece of craft paper draped over it and pinned to the top of the chair with your product placed in the centre.
For outdoor product shoots, it is best to use natural light. You can achieve really beautiful results if you shoot early in the morning or in the late afternoon when the light is filtered at a smaller angle.

TIP FOUR
Setting Your Product’s Scene
Once you get the lighting right, you’re almost ready to shoot. Find the best positioning or structure for your product.
For example: if you’re shooting jewellery, it’s always best to use a bust. Those on a budget can improvise by making one from a piece of cardboard. You can also use fishing line to suspend earrings and other small items, which is easily removed in the editing process.
Product images not only testify to the quality of your product but also serve as windows into your eCommerce store, creating two very important things, transparency and trust
When consumers view a product page, they are looking for proof of quality and value. Images shape their first impression, creating a tipping point as to whether they will continue browsing and eventually make a purchase.
TIP FIVE
Don’t Forget Post Processing!
Retouching your images after the shoot is vital to achieving a polished look. For those starting out, getting the background or the lighting right takes a bit of trial and error, but thankfully photo editing software can make a multitude of flaws magically disappear.
Retouching covers anything from background removal to colour correction, mannequin removal, and shadow addition for a more natural look. Photo editing is a time-consuming process, especially until you get the hang of things.
So just a recap and reminder…
What are the different types of product photography?
- Individual shots: A shot of your product (with a white background).
- Lifestyle shots: Shots of your product being used.
What equipment is needed for product photography?
- Camera: Smartphones will work, but higher quality cameras tend to help improve the look and feel of product photos.
- Lighting: Good light is key, ensure both natural and any artificial light sources are on point.
- White backdrop: A white backdrop (such as a light tent) will reflect light back onto your product and improve quality.
- Tripod: A tripod will reduce camera shake and overall quality of product photos.
Should I invest in professional product photography?
If you can afford it, yes.
Photos of your product both by themselves and in use are some of the most important merchandising and marketing efforts you do for your online brand.
Because consumers cannot touch or see your product in person, your product photography must do the trick.
If you can, hire a professional. If you can’t, this guide will walk you through how to bootstrap it for the time being.
Written by: Tye Leah Kettle
Photographs by: Peter Haarhoff